

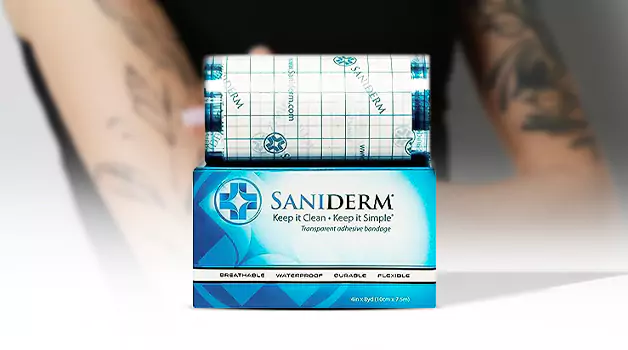
So, you’ve taken the plunge, rocked that tattoo session, and now you’re at the “what’s next?” stage. Well, grab your curious hats, because we’re about to dive into the exciting world of applying Saniderm to your fresh ink. Think of it as giving your tattoo a high-tech, transparent armor – but in a super chill, easy-to-follow way.
All right, picture this: you’ve just walked out of the tattoo studio, sporting a brand-new piece of art that’s all you. Now, cue the aftercare dance! This is where Saniderm swoops in with its protective magic. But, do you even know how to apply Saniderm to a tattoo? Fret not, I will be providing a step-by-step guide and more in today’s article.
Key Takeaways
- Reasons to apply Saniderm to tattoo are a shield against the world, moisture magic, minimized scabbing, reduced friction and irritation, faster healing, reduced itching, less chance of infection, no more sticky mess, it’s artist-approved, and peace of mind.
- You should apply Saniderm right after getting the tattoo for the first time and then within 48 hours of getting the tattoo for the second time.
- To apply Saniderm clean the canvas and gently put and rub the adhesive side of the Saniderm over your tattoo.
- To remove it peel it slowly from a corner and you can always use warm water or coconut oil to ease the adhesiveness of the Saniderm.
Knowing When to Apply Saniderm to Tattoo
Let’s tackle the timing game for Saniderm like a couple of pros. So, you’ve just rocked that tattoo session and now you’re wondering, “When’s the Saniderm party?” Here’s the lowdown on our laid-back chat style.
Wait for your tattoo to have a breather – usually a couple of hours after the inking process. You want to give your tattoo a chance to soak up that fresh air and let the initial oozing settle down. Once your skin’s feeling a bit more chill, it’s Saniderm time!
Think of it like this: your tattoo’s had its rockstar moment on stage, and now it’s ready for a cozy afterparty with Saniderm. You’re aiming for that sweet spot where your skin’s not too fresh but also not too healed – it’s like catching your favorite band on tour when they’re in their prime.
Remember, though, your tattoo artist’s the ultimate guide. They’ve got the wisdom to tell you when it’s prime time for Saniderm action. So, listen to their ink expertise, wait for the right moment, and get ready to give your tattoo the aftercare love it totally deserves.
Step By Step Guide on Applying Saniderm to Tattoo
Ready to dive into the Saniderm application adventure? Awesome! Let’s break it down, step by step, so you can give your tattoo the ultimate aftercare magic:
Step 1: Clean and prep

Before you get your Saniderm groove on, make sure your tattooed area is squeaky clean. Gently wash with mild soap and water, pat it dry with a clean paper towel (no rubbing, please!), and let that canvas shine.
Step 2: Gather your supplies

Think of this as your tattoo toolkit. You’ll need your Saniderm sheet, clean hands (we’re talking surgeon-clean), and a lot of enthusiasm.
Step 3: Peeling back the magic
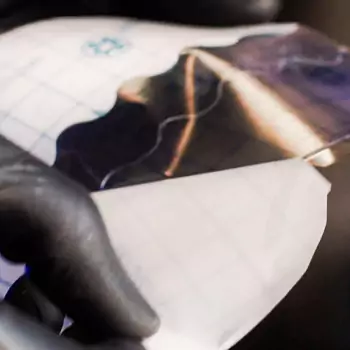
Here comes the fun part. Peel off the paper backing from your Saniderm sheet. It’s like revealing a secret treasure map – but instead of gold, you’re uncovering a world of healing goodness.
Step 4: Place and smooth
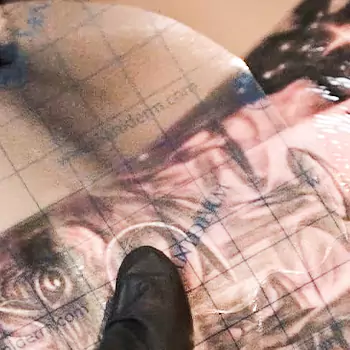
Now, gently lay the sticky side of the Saniderm onto your tattoo. Think of it like applying a super cool sticker, just with a bit more finesse. Smooth it down gently to avoid any pesky air bubbles. You’re creating a snug, cozy home for your ink.
Step 5: Press and seal
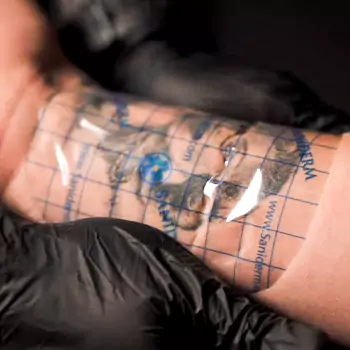
Give your Saniderm a little love tap – press it down gently to make sure it’s sticking like a champ. Air bubbles? No worries – just smooth them out carefully with your fingers. Imagine you’re tucking in your tattoo for a comfortable nap.
Step 6: Trim the excess
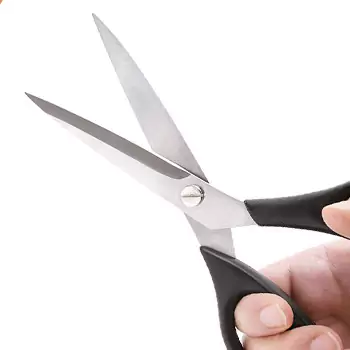
Your Saniderm should be like a perfectly tailored suit for your tattoo. If there’s any excess hanging off the edges, grab some scissors and give it a little trim. Just make sure you’re not snipping your tattoo by mistake – we’re aiming for a tattoo spa day, not a haircut!
Step 7: Admire your handiwork

You did it! Your tattoo’s now rocking its Saniderm shield. Take a moment to admire your masterpiece – you’ve just given your ink the superstar treatment.
Step 8: Follow the clock
Saniderm has its own schedule. Leave it on for a few days (your tattoo artist will guide you on the timing), and resist the urge to peek. Your tattoo’s in its cozy healing cocoon, so let it do its thing.
And that’s a wrap, my friends! You’ve mastered the art of applying Saniderm to your tattoo like a true pro. Remember, you’re giving your tattoo the royal aftercare treatment, and it’s going to thank you with some seriously epic healing. Happy applying, tattoo champs!
✨ You May like: How To Get Saniderm Residue Off Tattoo?
Step By Step Guide on Removing Saniderm From A Tattoo
So, you’ve given your ink the Saniderm treatment and now it’s time for the grand finale – removing it like a pro. Get ready to unveil your masterpiece with these easy-peasy steps:
Step 1: Choose the perfect moment
Timing is everything. Wait for the recommended period (your tattoo artist will be your timekeeper) before you embark on the great Saniderm unveiling. It’s like waiting for the curtain to rise at the perfect moment of a show.
Step 2: Wash those hands
Clean hands? Check! You don’t want any unexpected guests crashing the Saniderm farewell party.
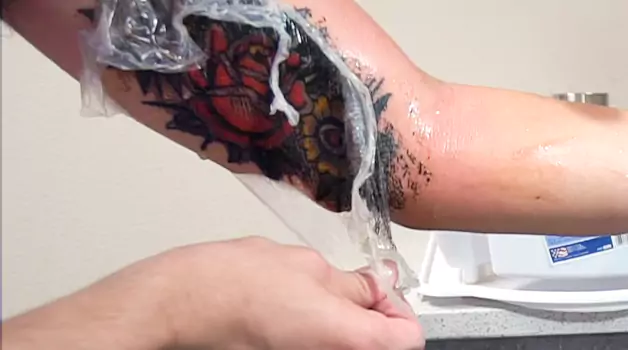
Step 3: Peel it slow
Start at a corner and gently peel back the Saniderm at a comfortable angle. Think of it like peeling off a sticker but with a bit more flair. Slow and steady wins the race – don’t rush this moment.
Step 4: Marvel at your tattoo
As the Saniderm comes off, your tattoo’s there, all fresh and healed, ready to dazzle. Take a moment to admire the masterpiece you’ve helped nurture.
Step 5: Cleanse the canvas
Give your tattooed area a little TLC with mild, fragrance-free soap and lukewarm water. Gently pat it dry – no rubbing, remember? It’s like giving your tattoo a post-Saniderm spa treatment.
Step 6: Embrace the peeling
Your tattoo might be shedding a bit of skin – it’s totally normal. Think of it as your tattoo’s way of saying goodbye to its old skin and showing off the new. Just don’t pick or peel it yourself – let your ink do its natural dance.
Step 7: Moisturize and love
Time for a little hydration party. Apply a tattoo-friendly lotion, but don’t go overboard. Your tattoo’s like a thirsty plant, but it doesn’t need a monsoon.
Step 8: Let it shine
Your tattoo’s now free to bask in the glory of the world. Show it off, let it breathe, and keep up with your regular aftercare routine.
Voilà! You’ve successfully peeled back the Saniderm curtain and revealed your healed masterpiece. Your tattoo’s ready to strut its stuff, and you’ve officially graduated from Saniderm University. Hats off to you, tattoo maestro!
10 Reasons to Apply Saniderm to Tattoo
Let’s dive into why Saniderm can be a total game-changer for your tattoo aftercare. Here are some rock-solid reasons to give your ink a Saniderm hug:
- Shield against the world: Think of Saniderm as your tattoo’s personal bodyguard. It creates a protective barrier that shields your fresh ink from dirt, germs, and other external nasties that might want to crash the tattoo party.
- Moisture magic: Hydration is the name of the game for healing tattoos. Saniderm locks in your skin’s natural healing moisture, keeping your tattoo well-hydrated and promoting optimal healing conditions.
- Minimized scabbing: Nobody likes scabs, especially not your tattoo. Saniderm can help minimize scab formation by keeping your tattoo’s surface consistently moist, which means less pesky crustiness to deal with.
- Reduced friction and irritation: You know that annoying feeling when your tattoo rubs against your clothes or sticks to your sheets? Saniderm acts like a slip ‘n slide, reducing friction and irritation, making your healing journey much smoother.
- Faster healing: With its protective embrace, Saniderm can speed up your tattoo’s healing process. It helps create an optimal environment for your skin cells to work their magic, allowing your ink to settle in and look its best sooner.
- Reduced itching: Itchy tattoos are a real struggle, but Saniderm’s got your back. By minimizing air exposure and scabbing, it can help keep those itch-inducing moments at bay.
- Less chance of infection: Let’s face it – tattoos are open wounds. Saniderm acts like a germ-repellent force field, reducing the risk of infection and keeping your tattooed area safer during those crucial initial healing days.
- No more sticky mess: Traditional aftercare methods involve ointments that can leave your tattoo feeling like a sticky science experiment. Saniderm offers a mess-free alternative, without the gooey hassle.
- It’s artist-approved: Many tattoo artists swear by Saniderm as part of their aftercare recommendations. Following their advice can help ensure you’re giving your tattoo the best possible care.
- Peace of mind: Applying Saniderm gives you the peace of mind that you’re actively contributing to your tattoo’s healing journey. It’s like giving your ink a cozy, healing embrace that sets you up for success.
So, there you have it – a bunch of awesome reasons to consider slapping on some Saniderm and giving your tattoo that extra TLC it totally deserves. Happy healing, fellow tattoo enthusiasts!
FAQs
What is Saniderm, and why should I use it for my tattoo?
Saniderm is a transparent adhesive film designed to protect and aid in the healing process of tattoos. It creates a barrier against dirt, germs, and friction, promoting faster healing and reducing scabbing.
When should I apply Saniderm to my fresh tattoo?
Wait a couple of hours after getting your tattoo before applying Saniderm. Your skin needs time to breathe and settle. Follow your tattoo artist’s guidance for the best timing.
How do I prepare for applying Saniderm?
Start with clean hands and ensure the tattooed area is free from excess ink, ointment, and blood. Pat the area dry gently with a clean paper towel.
How long to leave Saniderm on tattoo?
Follow your tattoo artist’s recommendation, usually 4 to 6 days. Leaving it on too long may lead to excess moisture while removing it too soon might disrupt healing.
How to remove Saniderm?
Gently peel back a corner of the Saniderm at a comfortable angle. Slowly continue peeling while supporting your skin. If it feels resistant, you can use warm water to help loosen the adhesive.
Final Thoughts
And there you have it, my friend! You’ve unlocked the secrets of applying Saniderm like a total pro. It’s like giving your tattoo the superhero cape it deserves during the healing marathon.
Remember, Saniderm isn’t just your ordinary sidekick – it’s your tattoo’s best buddy. With its protective embrace, moisture magic, and anti-scab wizardry, Saniderm is here to make your healing journey smoother than a rock ballad.
From choosing the right moment to peel and reveal, to giving your ink a post-Saniderm spa treatment, you’ve aced every step. Your tattoo’s in good hands – yours, and the trusted advice of your tattoo artist.
So, go on and give your ink that special Saniderm love. Your masterpiece is ready to heal in style, and you’re the rockstar making it happen. Keep rocking those aftercare vibes and let your tattoo shine bright!
✨ Next Attraction: What Does The Tattoo Igy6 Mean?